
 zakialawi

In today's rapidly evolving world of geospatial technology and remote sensing, the ability to transform raw aerial photographs into precise, measurable 3D models and maps is invaluable. From environmental monitoring and urban planning to construction progress tracking and agricultural analysis, the insights gained from aerial data are immense. At the heart of this transformation for many professionals and enthusiasts lies powerful photogrammetry software, and one name stands out prominently: Agisoft Metashape. This comprehensive tutorial will guide you through the essential steps of processing aerial photos using Agisoft Metashape, empowering you to create high-quality 3D models, orthomosaics, and Digital Elevation Models (DEMs) with confidence.
What is Agisoft Metashape Your Gateway to 3D Mapping
Agisoft Metashape, formerly known as Agisoft PhotoScan, is a standalone software product that performs photogrammetric processing of digital images and generates 3D spatial data. It's widely used across various industries for its robust capabilities in creating point clouds, textured 3D models, orthomosaics, and DEMs from still images. Whether your images come from drones (UAVs), traditional aerial cameras, or even ground-based cameras, Metashape provides a powerful and intuitive workflow for accurate reconstruction and analysis.
Its strength lies in its ability to handle large datasets, produce highly accurate results, and offer a flexible workflow that can be adapted to different project requirements. For anyone involved in aerial mapping or 3D modeling from photos, understanding Agisoft Metashape is a fundamental skill.
Getting Started Setting Up Your Agisoft Metashape Project
Before you dive into the processing, you need to set up your project correctly. This involves preparing your aerial imagery and importing it into Metashape.
Preparing Your Aerial Imagery
The quality of your final output heavily depends on the quality of your input images. Here are a few tips:
- Overlap: Ensure sufficient front (forward) and side (lateral) overlap in your images, typically 70-80% for both. This is crucial for robust alignment and reconstruction.
- Lighting: Uniform lighting conditions are ideal. Avoid harsh shadows or highly reflective surfaces.
- Focus and Sharpness: Images should be sharp and in focus. Blurred images will lead to poor reconstruction.
- EXIF Data: Ensure your images contain accurate EXIF data, especially camera intrinsics and GPS coordinates (if available). Metashape uses this information to optimize processing.
Creating a New Project and Importing Photos
Once your photos are ready, follow these steps in Agisoft Metashape:
- Open Agisoft Metashape.
Go to "File" > "New" to create a new project.

To add your aerial photos, go to "Workflow" > "Add Photos...". Navigate to your folder of aerial images and select all of them. Click "Open".

Your photos will appear in the "Photos" pane. If your photos have GPS metadata, you'll see coordinate information associated with each image.

Step-by-Step Aerial Photo Processing Workflow
The core of Agisoft Metashape's power lies in its step-by-step workflow. Each step builds upon the previous one to create increasingly detailed and accurate models.
Step 1 Aligning Photos The Foundation of Your Model
Photo alignment is the first and most critical step. Metashape identifies common features (tie points) across multiple images and uses them to determine the camera positions and orientations. This creates a sparse point cloud.
Go to "Workflow" > "Align Photos...".

- In the "Align Photos" dialog box, you'll see several parameters:
- Accuracy: "High" or "Highest" is recommended for most aerial mapping projects. Lower accuracy speeds up the process but might result in less precise alignment.
- Pair Preselection: "Generic preselection" is usually good. If you have precise GPS data, "Reference preselection" can accelerate the process.
- Key point limit: This determines the maximum number of key points to extract from each image. Default is usually sufficient, but you can increase it for complex scenes or decrease for faster processing.
Tie point limit: This sets the maximum number of tie points to match between image pairs.

- Click "OK" to start the alignment process. This can take some time depending on the number of photos and accuracy settings.
- Once complete, you'll see a sparse point cloud in the "Model" view, representing the camera positions and the general shape of your scene.
Result of align photos…

Step 2 Building the Dense Cloud Precision in Every Point
After alignment, the sparse point cloud provides a basic outline. Building the dense cloud generates millions of precisely located points, creating a detailed 3D representation of the scene.
Go to "Workflow" > "Build Dense Cloud..." or “build point cloud…”.

- Key parameters in the "Build Dense Cloud" dialog:
- Quality: "High" or "Ultra High" is typically used for orthophoto and DEM generation. Lower quality options (e.g., "Medium," "Low") are faster but less detailed.
Depth Filtering: "Aggressive" removes more outliers but might smooth out fine details. "Mild" or "Moderate" is often a good balance.

- Click "OK". This is usually the most computationally intensive step and can take a long time, especially for large datasets.
Once finished, you'll have a dense point cloud in your "Model" view, offering a much more detailed 3D representation.

Step 3 Generating the Mesh and Texture Bringing Your Model to Life
The dense cloud is a collection of points. To create a solid, renderable 3D model, you need to build a mesh (a polygonal surface) and then apply textures from the original images.
Building the Mesh
Go to "Workflow" > "Build Mesh...".

- Important settings:
- Source data: Select "Dense Cloud".
- Surface type: "Arbitrary" for most objects. "Height Field" is better for flat terrain where you want a DEM-like mesh.
Face count: Determines the polygon count of the mesh. Higher numbers mean more detail but larger file sizes and slower rendering.

- Click "OK".

Building the Texture
Go to "Workflow" > "Build Texture...".

- Key parameters:
- Source data: "Images".
- Mapping mode: "Generic" is good for most models.
- Blending mode: "Mosaic" provides seamless blending of textures.
Texture size/count: Adjust based on desired resolution and target platform.

- Click "OK". Your 3D model will now appear textured in the "Model" view.

Step 4 Creating Orthomosaics and DEMs Essential Geospatial Products
For most aerial mapping projects, the ultimate goal is to produce 2D orthomosaic maps and Digital Elevation Models (DEMs).
Building the DEM (Digital Elevation Model)
- Go to "Workflow" > "Build DEM...".
- Settings:
- Source data: "Dense Cloud" or "Mesh" (Mesh is generally preferred for smoother DEMs).
- Projection: Choose the appropriate coordinate system for your project (e.g., WGS84, UTM zone).
Resolution: Define the GSD (Ground Sample Distance) for your DEM.

- Click "OK".

Building the Orthomosaic
- Go to "Workflow" > "Build Orthomosaic...".
- Settings:
- Surface: Select the DEM you just built.
- Blended mode: "Mosaic (default)" is typically the best option.
- Projection: Match the DEM's projection.
Resolution: Define the desired GSD for your orthomosaic.

- Click "OK".
After these steps, you will have a high-resolution orthomosaic map and a DEM that can be exported for use in GIS software or other applications.


And you can generate this report processing…
Download here for view example this processing…


If you want high accuracy processing using Ground Control Points (GCPs), you can watch the following video.
Optimizing Performance and Quality Tips for Efficient Processing
Processing large aerial datasets in Agisoft Metashape can be resource-intensive. Here are some tips to optimize performance and ensure quality:
- Hardware Matters: Metashape heavily utilizes RAM and GPU. Invest in a system with ample RAM (32GB+ recommended), a powerful multi-core CPU, and a high-end NVIDIA GPU for faster processing.
- Processing Settings: Experiment with "Quality" settings. While "Ultra High" yields the best results, "High" is often sufficient and significantly faster. For preliminary checks, even "Medium" or "Low" can be used.
- Chunk Management: For extremely large projects, consider splitting your project into multiple "chunks." Each chunk can be processed independently and then merged, reducing memory strain and allowing for parallel processing.
- Filtering: After dense cloud generation, use the "Filter Dense Cloud" tools (e.g., "Gradual Selection" by reprojection error or confidence) to remove outliers and noise before building the mesh. This improves model quality and reduces mesh irregularities.
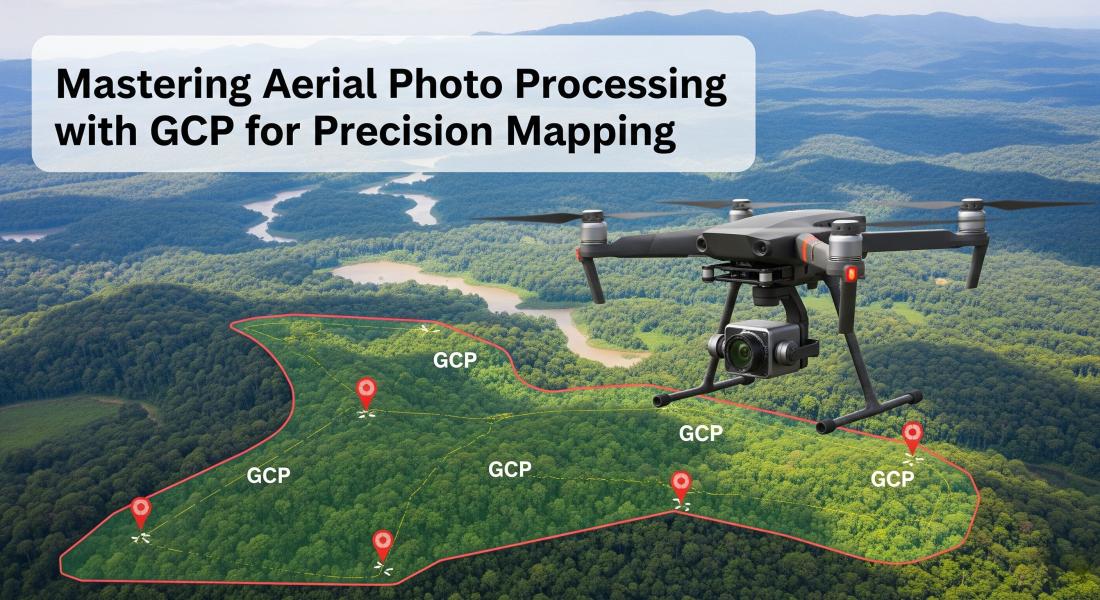
- Ground Control Points (GCPs): For highly accurate, georeferenced models, incorporating GCPs is crucial. These are precisely measured points on the ground that you identify in your images. You add them in the "Reference" pane and optimize the camera alignment. Read here for processing with GCP.
Common Challenges and How to Overcome Them
Even with careful planning, you might encounter issues during processing. Here are some common challenges and their solutions:
- Poor Photo Alignment:
- Cause: Insufficient image overlap, poor image quality (blur, motion blur), highly uniform surfaces (e.g., water, snow), lack of texture, moving objects.
- Solution: Re-fly with more overlap, ensure sharp images, capture images with different angles if possible, manually add tie points in challenging areas, mask out moving objects. For uniform surfaces, consider adding temporary markers or flying at a lower altitude.
- Distorted or Incomplete Models:
- Cause: Lens distortion not properly compensated, poor camera calibration, insufficient images covering the entire object, strong lighting variations.
- Solution: Ensure Metashape correctly identifies your camera and applies appropriate distortion parameters. If you have custom camera calibration, import it. Increase image density, especially in complex areas. Use masks to exclude reflections or problematic areas.
- Long Processing Times:
- Cause: High-quality settings on an underpowered machine, very large number of high-resolution images.
- Solution: Upgrade hardware (more RAM, better GPU). Reduce quality settings for intermediate steps. Process in chunks. Close other applications to free up resources.
- Out of Memory Errors:
- Cause: Attempting to process too large a dataset for your system's RAM.
- Solution: Process in chunks. Reduce image resolution before import (if acceptable for your project accuracy). Lower dense cloud quality settings. Ensure your operating system is 64-bit and Metashape is using all available RAM.
- Inaccurate Georeferencing:
- Cause: Inaccurate GPS data in photos, insufficient or poorly distributed GCPs, incorrect coordinate system selection.
- Solution: Verify image GPS accuracy. Use high-precision GCPs (and enough of them, typically 5+ well-distributed). Ensure you select the correct geographic and projected coordinate systems for your region.
Beyond the Basics Advanced Metashape Features
Once you're comfortable with the basic workflow, Agisoft Metashape offers many advanced features to refine your projects:
- Ground Control Points (GCPs): As mentioned, GCPs are crucial for achieving survey-grade accuracy. Import GCP coordinates and precisely mark them on your images to align your model to real-world coordinates.
- Markers and Scale Bars: Similar to GCPs, markers can be used for precise internal scaling of objects, and scale bars can define distances if you don't have external georeferencing.
- Masking: Use the masking tools to exclude unwanted elements (e.g., people, moving cars, water bodies, sky) from processing, which can improve alignment and model quality.
- Batch Processing: For repetitive tasks or processing multiple projects, Metashape allows you to create Python scripts to automate workflows, significantly saving time. While writing full scripts is beyond this basic tutorial, knowing it's possible opens doors for future efficiency.
- Export Options: Metashape supports a wide array of export formats for point clouds (LAS, LAZ), 3D models (OBJ, FBX, PLY), orthomosaics (GeoTIFF, JPG), and DEMs (GeoTIFF).
Agisoft Metashape is a powerful tool that transforms aerial imagery into tangible, measurable 3D products. By mastering its workflow, you unlock a vast potential for applications across numerous fields. From the initial photo alignment to the final orthomosaic generation, each step is crucial for achieving high-quality results. Remember that practice makes perfect, and experimenting with different settings will help you understand their impact on your specific projects.
Start your journey today by trying one of these tips or processing your first drone dataset. Share your own tips and project experiences in the comments below!
Popular Posts


Categories
Tags

Comments